

How to Brew Fresh Coffee Correctly: Step-by-Step
Table of Contents
- What You'll Need Before You Brew Fresh Coffee
- Step 1: Start With Fresh-Roasted Whole Beans
- Step 2: Pick the Right Grind Size for Pour Over Coffee
- Step 3: Get Your Coffee-to-Water Ratio Right
- Step 4: Use the Best Water Temperature for Coffee
- Step 5: Know How Long to Brew Coffee
- Step 6: Pour, Stir, and Finish the Brew
- Troubleshooting by Taste: Fixing Over- and Under-Extraction
- Frequently Asked Questions
Last Updated: October 19, 2026
What You'll Need Before You Brew Fresh Coffee
Great coffee is mostly a setup problem, not a talent problem. Get the gear and the numbers right, and the cup follows almost automatically.
This guide from Taylor Brothers Coffee walks you through the exact steps we use to brew fresh coffee correctly at home. No guesswork, no fancy barista skills.
We'll cover the six steps that matter, plus how to fix a cup that tastes off. Keep reading and you'll have a method you can trust by tomorrow.
Here's what most guides get wrong: they list every brewing method and leave you to pick. We'll show you the measurements that actually decide whether your cup tastes good or bitter.
Step 1: Start With Fresh-Roasted Whole Beans
Freshness is the single biggest factor in how your coffee tastes. Beans hit their peak flavor days after roasting, then slowly fade.
That's why we roast every batch to order at Taylor Brothers Coffee. Your bag leaves the roastery close to its best, not months past it.
Buy whole beans and grind them yourself. Pre-ground coffee goes stale fast because more surface meets the air. A burr grinder gives you an even grind, which is the next step.
Start with a medium roast if you're unsure. Our House Blend is smooth and consistent, with notes of sweet chocolate and mild citrus. It's a forgiving place to begin.

Storage and degassing after delivery
Freshly roasted beans release gas for a few days. This is called degassing, and it's normal.
- Wait 3 to 7 days after the roast date before brewing for the cleanest flavor.
- Store beans in an airtight container, away from light and heat.
- Keep them out of the fridge. Moisture and odors get in.
Step 2: Pick the Right Grind Size for Pour Over Coffee
The right grind size for pour over coffee is a medium grind, close to the texture of sea salt. It's fine enough to extract flavor but coarse enough to let water pass through in a few minutes.
Grind size controls how fast water pulls flavor out of the grounds. Too fine and the water stalls, turning the cup bitter. Too coarse and it drains too fast, leaving it weak and sour.
Use a burr grinder for even particles. Blade grinders chop unevenly, so some grounds over-extract while others under-extract. That's why the cup tastes muddy.
Grind size by brewing method
| Method | Grind size | Texture guide |
|---|---|---|
| French press | Coarse | Like breadcrumbs |
| Drip coffee | Medium | Like table salt |
| Pour over | Medium | Like sea salt |
| Espresso | Fine | Like powdered sugar |
Match the grind to your method and keep it consistent. Consistency matters more than hitting a perfect number.
Step 3: Get Your Coffee-to-Water Ratio Right
The coffee-to-water ratio is the weight of coffee compared to the weight of water. A good starting point is 1 gram of coffee to 16 grams of water.
That means about 60 grams of coffee for 1 liter of water. If you don't have a scale, use roughly 2 tablespoons of ground coffee per 180 milliliters of water.
A digital scale is the cheapest upgrade you can make. It turns brewing from guesswork into something repeatable. Weigh both the coffee and the water, and you'll get the same cup every time.
Want a stronger cup? Tighten the ratio to 1:15. Want it lighter? Open it to 1:17. Change one variable at a time so you know what worked.
Step 4: Use the Best Water Temperature for Coffee
The best water temperature for coffee is between 90°C and 96°C, just below boiling. Water that's too hot scalds the grounds and pulls out bitter compounds. Water that's too cool under-extracts and leaves the cup sour.
If you don't have a thermometer, boil your kettle and let it rest for about 30 seconds. That brings it into the right range.
Water quality and filtration
Water makes up most of your cup, so it matters. Use filtered water when you can.
- Avoid distilled water. It lacks the minerals that help flavor come through.
- Skip hard tap water if it tastes strongly of chlorine or metal.
- A simple carbon filter is enough for most homes.
Step 5: Know How Long to Brew Coffee
Brew time is not a single number, it is the result of your grind, dose, and method working together. The table below gives starting times for common methods, then explains how to adjust them and how to scale for more servings.
Starting brew times by method
| Method | Dose (coffee) | Water | Grind | Target time |
|---|---|---|---|---|
| Pour over (V60-style) | 18 g | 300 g | Medium | 3:00-3:30 |
| French press | 30 g | 500 g | Coarse | 4:00 steep, then press |
| Drip machine | 60 g | 1 L | Medium | 5:00-6:00 |
| AeroPress | 15 g | 220 g | Medium-fine | 1:30-2:00 |
| Moka pot | 15 g | 150 g | Fine | 4:00-5:00 on heat |
These are starting points, not rules. Adjust one variable at a time and taste.
How time interacts with grind and dose
- Finer grind → shorter time. More surface area extracts faster; a fine grind left too long turns bitter.
- Coarser grind → longer time. Less surface area needs more contact to extract fully.
- Larger dose → longer time. More coffee holds more water and slows drawdown; scale time up slightly when you scale the recipe.
- Hotter water → shorter time. Water near 96°C extracts faster than water at 90°C.
A common pattern: if your cup tastes bitter, shorten the time or grind coarser before changing anything else. If it tastes sour, lengthen the time or grind finer.
Scaling the recipe for more servings
To brew for two, double the coffee and water (e.g., 36 g coffee, 600 g water for pour over) and expect the total time to increase by roughly 30-60 seconds because the bed is deeper. For four servings, use 72 g coffee and 1.2 L water, and consider brewing in two batches if your dripper is small, overloading a dripper stalls the drawdown and produces uneven extraction.
Use a scale and timer for every batch. "About right" drifts; a recorded time and weight lets you repeat a good cup and fix a bad one.
Step 6: Pour, Stir, and Finish the Brew
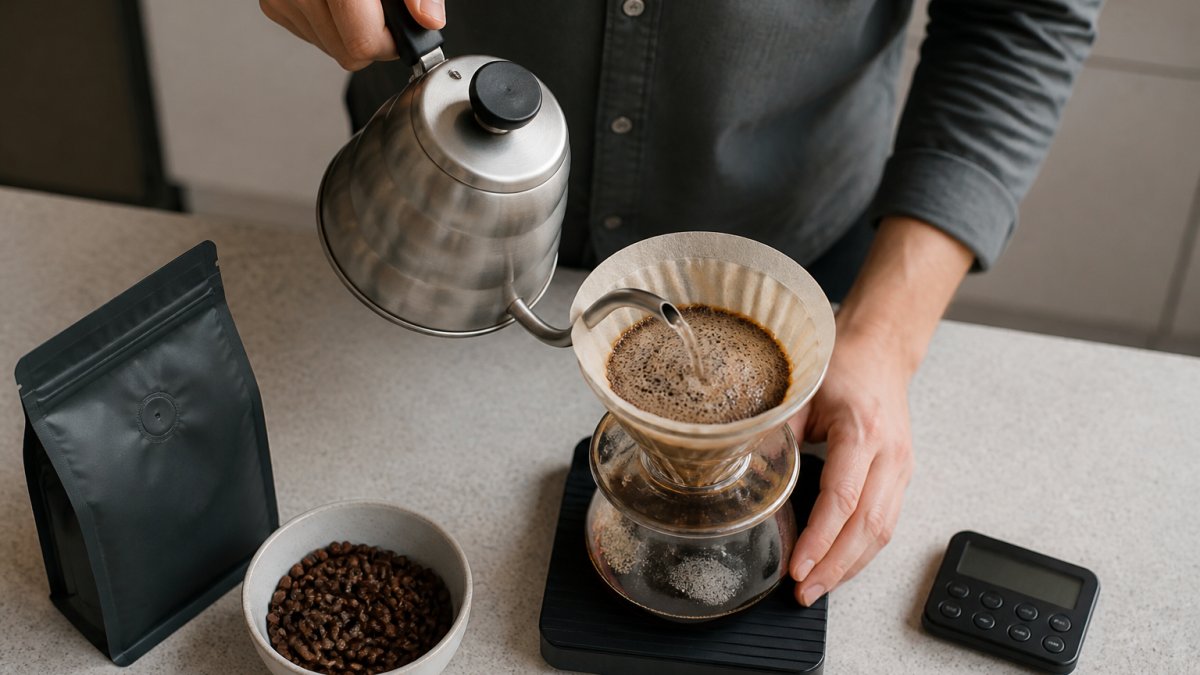
Pouring is where most home brewers lose consistency. The fix is a repeatable pour schedule with checkpoints, not a feel-based spiral. Below is a complete pour over recipe you can run with a scale and timer, plus the finishing steps that apply to any method.
A repeatable pour over recipe (1 serving, ~300 ml)
Use a medium grind (sea salt texture), 18 g of coffee, and 300 g of water at 93°C. Total brew time: 3:00-3:30.
| Time | Action | Target scale reading |
|---|---|---|
| 0:00 | Bloom: pour 40-50 g water, wet all grounds | ~50 g |
| 0:00-0:45 | Wait for degassing; gently swirl the dripper | ~50 g |
| 0:45-1:15 | First pour in slow circles to 150 g | ~150 g |
| 1:15-1:45 | Second pour to 225 g | ~225 g |
| 1:45-2:15 | Final pour to 300 g | ~300 g |
| 2:15-3:30 | Let drain fully; bed should be flat | 0 g in carafe |
Checkpoints: the bloom should bubble and settle within 45 seconds (a sign of fresh beans). The bed should finish flat, not cratered. If the drawdown stalls past 3:30, your grind is too fine or you poured too aggressively.
Pour technique that actually matters
- Use a gooseneck kettle. A controlled stream keeps water in the bed instead of down the filter walls.
- Pour in slow circles, center outward. Avoid pouring directly on the filter paper; water bypasses the grounds and tastes thin.
- Keep the water level steady. A stable bed temperature extracts evenly; a surging level extracts unevenly.
- Don't stir aggressively. A gentle swirl at the bloom is enough; vigorous stirring pushes fines through the filter and muddies the cup.
Finishing steps for any method
- Swirl the carafe or press pot before serving so the first and last cups match.
- Serve immediately. Coffee held on a hot plate or in a thermos keeps extracting and turns bitter within 20-30 minutes.
- Rinse the filter first with hot water for pour over; it removes papery taste and preheats the dripper.
Troubleshooting by Taste: Fixing Over- and Under-Extraction
Your tongue is the best diagnostic tool you have. Two problems cause most bad cups: over-extraction and under-extraction.
Over-extraction tastes bitter, dry, or hollow. The water pulled out too much. Fix it by grinding coarser, brewing for less time, or lowering the water temperature slightly.
Under-extraction tastes sour, thin, or salty. The water didn't pull out enough. Fix it by grinding finer, brewing longer, or using hotter water.
| Taste problem | Likely cause | Fix |
|---|---|---|
| Bitter, dry | Over-extraction | Coarser grind, shorter brew |
| Sour, thin | Under-extraction | Finer grind, longer brew |
| Weak, watery | Too little coffee | Tighten the ratio |
| Muddy, silty | Too fine a grind | Coarser grind |
Change one thing at a time. If you adjust the grind and the time together, you won't know which fix worked.
A common mistake is blaming the beans when the real issue is the grind. Try a small adjustment before you switch bags.
Brewing fresh coffee correctly takes a little practice, but the payoff is a cup you can count on every morning. Start with our Medium Blend or the House Blend and taste the difference fresh roasting makes.

Frequently Asked Questions
What is the best way to make fresh coffee at home?
Start with whole beans roasted recently, grind them just before brewing, and use filtered water just below boiling. Weigh your coffee and water so the coffee-to-water ratio stays consistent, then follow a method-specific brew time. A pour-over gives you the most control, while a French press is more forgiving. The single biggest upgrade for most people is grinding fresh rather than buying pre-ground coffee, because aroma and flavor fade quickly once beans are ground.
How much coffee should I use per cup of water?
A reliable starting point is roughly 60 grams of coffee per liter of water, which works out to about 15 grams for a 250 ml cup. If that tastes too strong or too weak, adjust in small steps of a gram or two rather than changing everything at once. Weighing your coffee dose with a scale is far more accurate than scoops, since scoop size varies with grind and bean density. Keep notes so you can repeat the cup you liked.
How fine should I grind coffee for different brewing methods?
Pour-over and drip coffee work best with a medium grind, similar to table salt. French press and other immersion methods need a coarse grind, closer to sea salt, so the grounds settle and don't clog the filter. Espresso requires a fine grind. If your coffee tastes bitter and muddy, grind coarser; if it tastes sour and thin, grind finer. Adjust the grind before changing your ratio, since grind has the largest effect on extraction.
How do I keep my coffee fresh after it arrives?
Store whole beans in an airtight container away from light, heat, and moisture, and keep the bag sealed between uses. Freshly roasted beans release carbon dioxide for several days, so give them a short rest before brewing for the most balanced flavor. Buy amounts you'll finish within a few weeks rather than stockpiling. If you go through about half a bag a week, a smaller regular delivery keeps every cup closer to its roast date.